Let’s make some pictures!
I remember when I was first introduced to photography thinking how magical and out of reach the process of making negatives seemed. It wasn’t until years later that I learned how incredibly easy it is. I felt bummed that I could have been shooting B&W film and developing it myself all along so I thought I would write a little How-To on developing your own B&W film.
I am going to try to be pretty comprehensive but just so that all is understood well. I was always the little kid that asked, “but why” and “but how” so I will tell you as much as I can here in hopes that you have no questions at the end, but feel free to email me if you do! Don’t let the length of this tutorial overwhelm you. Just do it step by step and you’ll be fine.
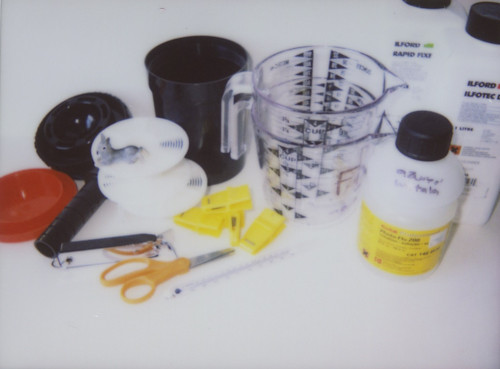
Here's what you’ll need:
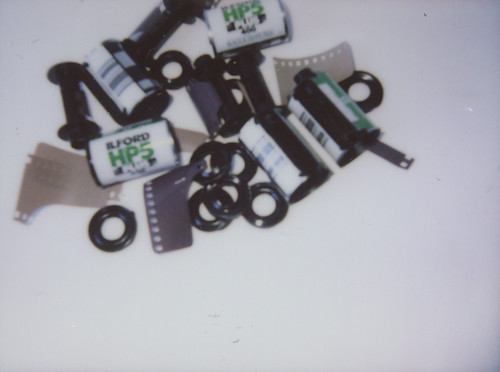
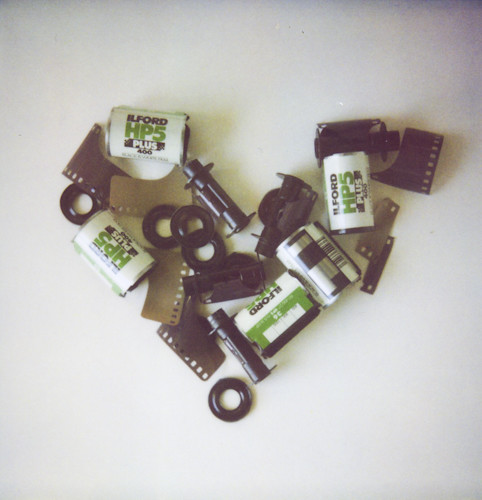
35mm B&W film (make sure it does NOT say C41 or it won’t work) *Ilford HP5
Developing tank with reels (I like the plastic ones best)
Scissors
Can opener
Thermometer
Developer *Ilford Ilfotex DD-X
Wetting Agent *Kodak Photo Flo
Fixer *Ilford Rapid Fixer
3 Measuring cups
Something to hang negatives from (clothes pins will work if you can hang a line in your house somewhere)
Negative Sleeves
A completely dark place or a changing bag
Photo Clips (clothes pins will work here too, but clips are inexpensive and work better)
A timer of some kind
* Indicates what I personally use. This is just a guide there are many many options!
Sexy Extras:
Stop Bath
2 Gallon Containers (for storing your diluted chemistry)
Squeegee
Photo Clips
Anti Static Cloth
I created a wish list at B&H, the site I recommend purchasing your supplies from to make things a little easier on you! Click here to go shopping.
STEP ONE: AH SHOOT!
Shoot a roll of B&W film. I like to shoot Iflord HP5 because it’s inexpensive and forgiving.
STEP TWO: DARKNESS
You’ll need to find a completely light free place to put your film onto the reel. Even the smallest amount of light will make your negatives foggy and gross. A closet or windowless bathroom will usually work. If after sitting in the dark place you’ve chosen for a few minutes you can still see, it’s not dark enough. Tape up the door or wherever light is coming from. If you can’t find a dark enough place, use a changing bag- that’s what I do.
You’ll need to grab your scissors, can opener, roll of film, and developing tank. The tank has 2 reels, a rod, a funnel like thing and a lid.
I would suggest practicing loading the reel in daylight with your eyes closed a few times before working with an actual roll of film you care about. Without practice this step that should be fairly easy with practice can be really frustrating so set yourself up for success and practice first! You won’t be sorry.
Okay, go to your dark place or changing bag with your items. Place them in a way you will remember them because it will be completely dark and you’ll need to feel around for these things.
1. Use the can opener to open the film canister top and bottom.
2. Use your scissors to cut off the leader of the film. This is a piece of film that is not flush. If you use a practice roll you’ll see this and know what I’m talking about.
3. Lead the film onto the reel. You’ll be able to feel the reel grabbing the film’s sprockets (those little holes at the top and bottom of the negative). Once the film is secure twist the sides of the reel back and forth, gently, with one hand on each side. This will ravel the film onto the reel. Once you’re at the end of your roll cut the film off of the canister core it’s stuck to.
4. Place the reel on the rod and then place it in the tank. Make sure the funnel is secure because if not when you remove the lid to the tank your film might be exposed to light, which will ruin your film! Once you’re sure the funnel is secure (usually just by twisting it until you feel it lock) put the lid on the tank.
5. Voila! You’re ready for some chemistry. You can venture out into the light now.
STEP THREE: GET WET
Take your tank to a sink and get ready to mix some chemicals. Follow the directions on your chemicals to dilute them. I use Ilford chemicals and they are diluted 1+4 which means for every part of chemistry I use to dilute it with 4 equal parts of water. I usually develop 2 rolls of film at a time and have found that if I dilute one cup of chemistry with 4 cups of water that’s just the right amount of chemistry for 2 rolls of film. Dilute your chemicals with whatever temperature water it says on the packaging. For the chemicals I use it’s 68 degrees. It is VERY important to get the temperature right because water that is too cold or too hot can damage your negative or even completely erase your negatives!! So make sure to use that thermometer and be patient!
STEP FOUR: CHEMISTRY
Go ahead and take the lid off of your tank but make sure that the funnel is secure!
DEVELOP!
1. Fill your tank with water, replace the lid and shake your tank for one entire minute. Dump the water out completely. This step is preparing your negatives for the chemical goodness that is coming its way.
2. Turn your tank upside down and see how much liquid you should use for each roll of film you’re developing. The tank I use says to use 10 oz for one roll or 20 oz for two rolls.
3. Remove the lid (make sure that tunnel is still secure, sometimes it may shift after agitating the tank). Add the appropriate amount of developer for your tank, replace the lid and lightly turn it up and down for 30 seconds. You don’t want to shake it too much because the developer will become sudsy which isn’t good for your negative so be gentle! After the first minute -shake your tank the same way for ten seconds each minute. Look on your developer bottle to see what the suggested time is. For the llford Developer I use I have to develop my negative for 9 minutes total. Use a timer for this. The more accurately you do this the better your results will be.
4. When your 9 minutes is up dump your developer down the drain (this is okay- it won’t ruin your pipes) and rinse your tank with water that is 68 degrees. Fill your tank with water and shake it well, dump the water and repeat. Do this for one minute. Make sure your tunnel is still secure to your tank! Light would still be bad news at this stage.
FIX!
1. Dump the water from your developer rinse and fill your tank with the appropriate amount of fixer for your tank. Put the lid back on.
2. Gently shake your tank for 30 seconds when you first fill it with fixer and then shake it for 10 seconds every minute for the recommended amount of time the bottle of fixer says. My bottle of fixer says 9 minutes for the film I use. Again you’ll want to use timer for best results.
3. After your time is up you can either save your fixer to use again if you plan on developing more film within a week or two. If you want to save your fixer you need to store it in a dark bottle. These are pretty cheap from B&H (my favorite) and can save you money in the long run if you plan on developing a lot of your own film. If you don’t plan on developing anytime soon put the developer in an old soda bottle and take it to your local CVS. The fixer contains tiny pieces of silver that needs to be both recycled and disposed of properly.
RINSE!
1. This part is easy peasy. Make sure your water is 68 degrees. This is VERY important because like I said earlier, water that is too hot or too cold could damage or completely ruin your film. I usually let the water run into a cup with a thermometer in it. When the thermometer reads 68 degrees you’re ready to rinse.
2. Most people suggest filling your tank with water, shaking it for about five minutes to make sure all of that fixer comes off, emptying the tank and then letting it run under 68 degree water for 20 minutes. I usually take the tank filled with water put the lid on and give it a shake every five minutes for a few minutes, dump the water, then let it sit under the faucet with water running for five minutes. Use a timer so you don’t have to do too much guessing.
3. Your negatives are almost ready!!
WETTING AGENT!
1. Before you unreel your negatives dump the whole reel into a container with some kind of “wetting agent” in it. Photo Flo (what I use) is a magical formula that helps keep your negatives from scratching or streaking. It also promotes even drying. Basically it’s awesome. One bottle should last your entire life. You can store it for quite a while and it dilutes 1 part Photo Flo to 200 parts water!
2. I have a large measuring cup that fits two film reels perfectly and has a lid for storage (!). Drop your reel into the wetting agent you’re using for one minute.
3. After a minute (use that timer!) grab your reels and you are ready to take the film off the reel!!!
UN REEL!
1. Shake off the as much wetting agent as you can and then gently pull your film off the reel. Try to make sure it doesn’t touch anything and that you are doing this in a generally dust free area so dust doesn't stick to your negatives.
2. Place the negatives between your pointer and middle fingers to wipe off excess wetting agent. Do this gently, as not to scratch or smudge your film.
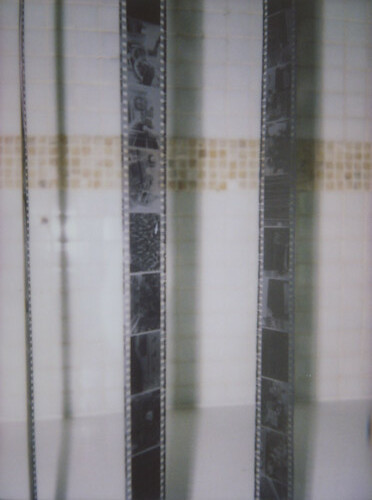
3. Hang your film up to dry! I use a laundry mobile looking thing to dry my negatives. If you have photo clips put them at the bottom of your negative to weigh it down a bit. This helps the film from curving and clinging to other film. If you don’t have negative clips- just add a clothes pin or two to the bottom of your negative.
4. Let your negatives dry for at least 4 hours but 8 hours is what is most recommended.
ALMOST DONE!
When your negatives are all dry grab a negative sleeve to store them in. Carefully cut your negatives about five frames per cut. Holding them up to the light helps or if you have something that can act like a light table that is also extremely helpful. Try to always handle your negatives only by the sides and never directly touching the surface. The grease on our fingers easily shows up on negatives and it’s never very pretty and can sometimes be hard to get off so try to avoid it if you can. I use a microfiber cloth to lightly wipe my negatives and scanning bed before scanning. I’ve had mine for about 6 years and it works like a charm. Just keep it in the sleeve it comes in and you should be good to go.
You’re all done!!! Now you can either scan your negatives or make a print in the darkroom!